How to Turn a Shower into a Sauna: A Step-by-Step Guide to Converting Your Shower to Sauna
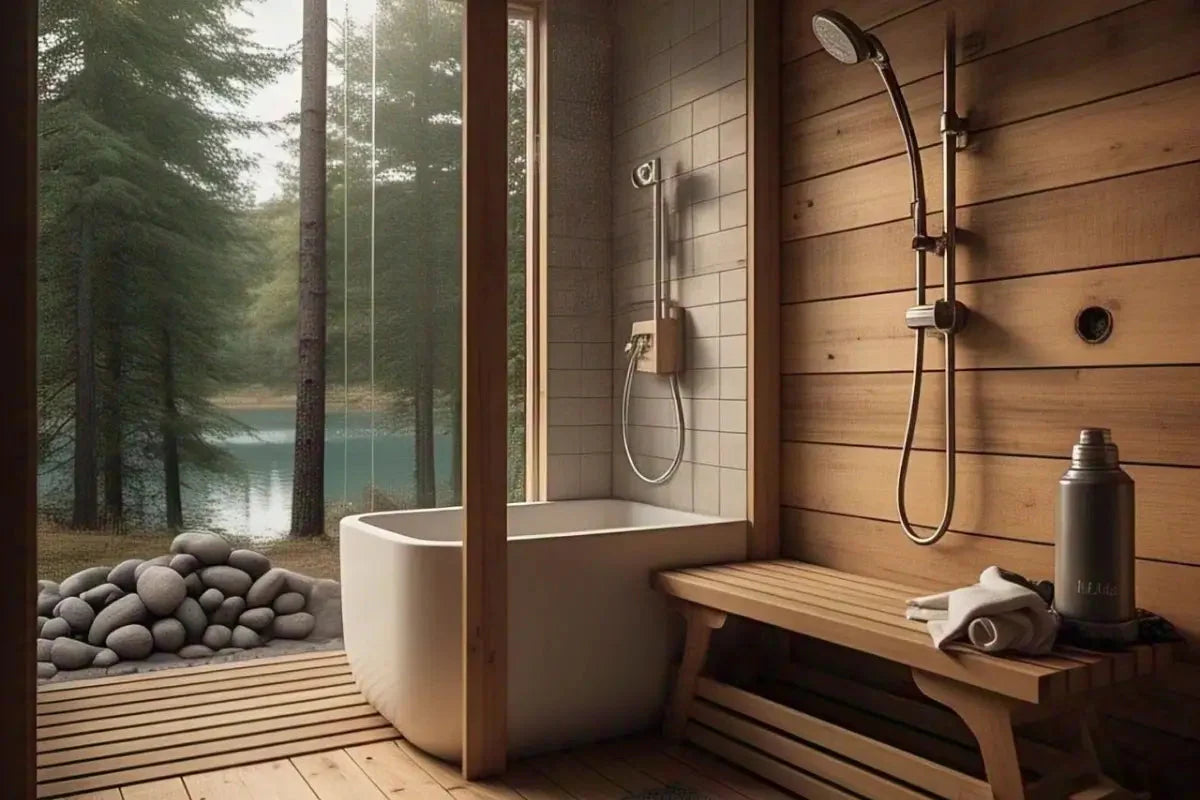
Your shower is just a shower, quick and routine, but not truly relaxing. But what if you could transform it into a soothing sauna experience?
Missing out on deep relaxation and health benefits can be frustrating. The good news is you do not need an expensive renovation. With a few simple tweaks, you can turn your shower into a personal sauna. Here is how!
Key Takeaways
DIY sauna conversion costs between $500–$2,000, while professional installation can exceed $5,000.
A DIY sauna project requires insulation, proper ventilation, and careful electrical work to avoid mistakes.
Choosing the right materials, like cedar wood and sauna-grade vapor barriers, improves durability.
Regular maintenance, including cleaning stones and checking ventilation, ensures long-term sauna performance.
Hiring a professional may save time and prevent costly errors, but DIY can be more budget-friendly if done correctly.
DIY vs. Professional Installation
Cost: Which option is more budget-friendly?
- DIY costs less at the start: Doing the installation yourself usually costs between $500 and $2,000, which makes it the cheaper option when just looking at the initial price.
- Extra costs can sneak into DIY: Even though DIY looks cheaper, you might end up spending more on tools, unexpected repairs, or fixing mistakes.
- Tool rentals and store visits can add up: Renting equipment and making multiple trips to the hardware store can quietly push your DIY costs higher than expected.
- Hiring a pro costs more but saves trouble: Paying a professional may cost over $5,000, but it includes their experience and saves you from handling complicated tasks on your own.
- Paying more now can save money later: Professionals work efficiently and avoid errors, which means you might actually save money in the long run by avoiding costly fixes.
Time Required: How long will each take?
Converting a shower into a sauna can take a few days to a few weeks, depending on your experience and the complexity of the project.
For a DIY setup, you may spend several weekends on the conversion. Professional installation typically takes less time since experts handle everything.
Either way, be prepared for a significant time investment to ensure your sauna works properly and safely.
Skill Level: Do you need expertise?
DIY sauna installation requires a good level of craftsmanship. You’ll need to handle tasks like insulating, installing a heater, and ensuring proper ventilation.
It's essential to be comfortable with tools and to understand the technical requirements, like safely setting up the sauna heater and sealing the area to prevent moisture damage.
If you're not confident, professional installation might be the better choice for a safer, more effective sauna.
Tools Needed: What equipment is required?
Essential tools include a staple gun for foil insulation, a utility knife for fiberglass, a drill, screwdriver, level, and sealant gun.
These tools are crucial for both assembling the sauna structure and ensuring proper insulation. You’ll also need screws, nails, and possibly wood adhesive depending on the materials you're working with.
Gathering everything upfront will streamline your installation process, reducing delays and ensuring all necessary components are readily available.
Customization: How much flexibility do you have?
- You can decide how much space your sauna needs: When you install a sauna yourself, you start by measuring your space. This gives you full control over how big or small you want the sauna, depending on your room and needs.
- You get to choose the insulation that suits your comfort: Cutting and fixing the insulation yourself means you can pick the type of material that works best for heat control and comfort. It's your call on how warm or quiet you want your sauna.
- You control where and how the wires are connected: If you're installing an electric heater, checking the wires and connections yourself gives you the freedom to place the heater exactly where you want it, based on your personal setup plan.
- You decide where fresh air flows in and out: Placing the air vents yourself lets you choose how the sauna breathes. Following the manufacturer's guide still gives you room to place them in a way that feels right for your comfort.
Mistake Risk: What could go wrong?
- If the sealing isn’t done right, steam and heat will leak out: DIY installations often miss the mark on proper sealing. This can cause heat and steam to escape, leading to hidden damage and performance issues over time.
- When things aren’t aligned properly, they stop looking and working right: Misalignment is a common DIY mistake that affects both how your setup looks and how well it works. Even small shifts can cause big problems.
- Doing your own electrical work can be dangerous: DIY electrical jobs without proper know-how can cause shocks, fire risks, or serious safety hazards. These mistakes can put lives and property in danger.
- One wrong move can cancel your warranty: Most warranties don’t cover DIY mistakes. If you mess something up, you might lose your warranty and have to pay for repairs yourself.
- Fixing DIY mistakes can cost more than hiring a pro in the first place: If something goes wrong, calling in an expert afterward can end up costing more than just hiring one to begin with. Errors can be expensive to undo.
- Small measuring mistakes can ruin the whole job: DIY work needs exact measurements. Even a tiny miscalculation can throw everything off and mess up the final result.
Warranty & Guarantee: What protections do you get?
- DIY jobs usually don’t come with any warranty: If you install something yourself, you probably won’t get any warranty unless the company clearly allows self-installation.
- Doing it yourself can cancel your product warranty: Many companies will void the warranty if a product isn’t installed by a licensed professional.
- Hiring a professional often means their work is guaranteed: When you pay for professional installation, the installer often includes a guarantee that protects you if something goes wrong.
- Product warranties change based on who installs it: Some manufacturers offer better or longer warranties only if the item is professionally installed.
- A professional warranty can save you from future repair costs: If a problem shows up later, having a professional-backed warranty could save you a lot of money on fixing it.
- Always read the warranty rules before trying it yourself: Before doing any DIY work, it’s important to check the product warranty to make sure you’re not losing any protection.
Safety Concerns: Is it safe to DIY?
- Doing it yourself can come with serious risks: Safety is one of the biggest concerns when installing something on your own. Electrical shocks, bad airflow, or weak support structures can all become dangerous if not done correctly.
- Touching wires without knowing what you're doing is dangerous: If you’re not trained to deal with electricity, trying to fix or install wiring can lead to serious accidents. It’s not worth the risk when an expert can handle it safely.
- Weak walls and poor sealing can cause long-term trouble: Skipping steps like reinforcing walls or sealing spaces properly might not seem like a big deal now, but these mistakes can lead to bigger and more expensive, problems later.
- Calling a pro is better than making a risky mistake: If something feels too hard or confusing, it’s safer to pause and get professional help. A small mistake today can turn into a big repair tomorrow.
Long-Term Durability: Which lasts longer?
- Professional installation usually lasts much longer: Professionally built saunas are made with better materials and expert skills, which helps them stay strong and reliable for many years.
- DIY saunas often wear out faster because of small mistakes: If something goes wrong during a DIY build, like weak framing or poor sealing, it can lead to damage over time, reducing how long the sauna lasts.
- Saving money at first might cost more later: DIY setups may seem cheaper in the beginning, but regular fixes and maintenance can add up and cancel out those early savings.
- A professionally built sauna is a safer long-term investment: Choosing a professional means fewer problems down the road. It lasts longer and works better, making it a smarter choice if you want it to hold up over time.
Materials and Tools Needed
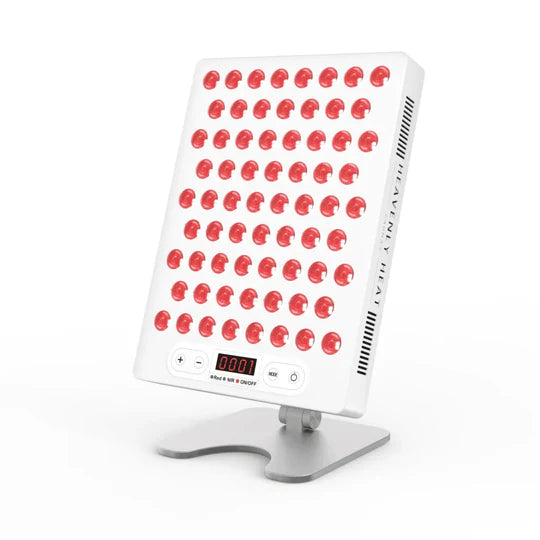
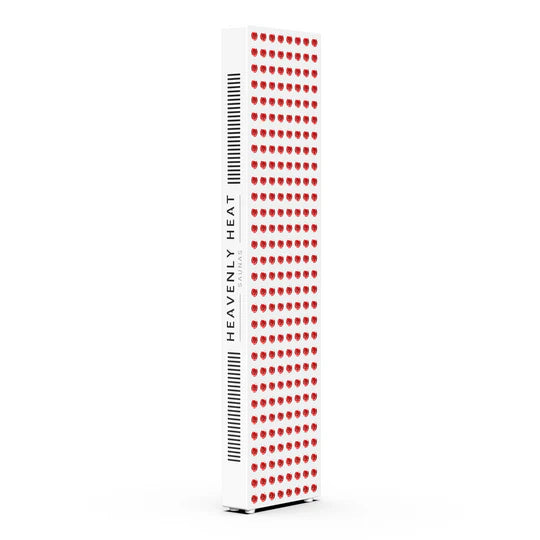
Sauna Heater (Infrared or Traditional)
The sauna heater is the heart of your sauna system. You can choose between an infrared or traditional sauna heater.
Traditional heaters use stones to generate heat, while infrared heaters use light to directly warm the body.
The choice between these two options depends on your preferences and budget. Infrared heaters generally cost less to install and maintain, while traditional heaters offer a more authentic sauna experience.
Sauna Wood (Cedar, Hemlock, or Pine)
- Cedar wood lasts longer and fights off mold naturally: Cedar is a top choice due to its natural resistance to mold and warping. It generally lasts longer than both hemlock and pine, making it a great long-term investment.
- Hemlock wood looks good but doesn’t handle moisture well: Hemlock is affordable and has a smooth finish, but it’s less resistant to moisture than cedar. It also gives off a neutral scent, which is great if you're sensitive to strong smells.
- Pine wood saves money but can crack from heat: Pine is budget-friendly but more prone to cracking under extreme heat compared to cedar and hemlock.
- Cedar keeps heat better than the others: If heat retention is a priority, cedar’s dense structure makes it an excellent choice for keeping your sauna warm and efficient.
Insulation (Foil or Fiberglass)
Proper insulation is key to maintaining the heat in your sauna. Use high-quality materials like foil or fiberglass to insulate the walls, floor, and ceiling of your converted shower space.
The goal is to trap heat within the sauna and prevent it from escaping into the rest of the bathroom.
If not properly insulated, your sauna will be inefficient and will struggle to maintain high temperatures.
Vapor Barrier (Prevents Moisture Buildup)
- Vapor barrier is the first defense against moisture in sauna walls: A vapor barrier protects your walls from moisture damage, which is essential in a sauna environment.
- Materials like foil or plastic sheets are best for stopping moisture: Common materials include aluminum foil, polyethylene sheeting, and specialized sauna-grade barriers.
- Thicker vapor barriers block moisture more effectively: For effective moisture control, the barrier should be at least 6 mils thick. In basements or humid areas, thicker barriers work best to prevent condensation issues.
- Cover every part of the sauna and seal the edges tightly: Installation should cover the entire sauna interior, sealing edges with aluminum tape to prevent air leaks.
- Strong vapor tape or adhesive makes the seal last longer: When sealing, opt for high-quality adhesives or vapor tape to ensure long-lasting protection against moisture damage.
Sauna Stones (For Traditional Steam Saunas)
- Sauna stones help spread the heat evenly: Sauna stones are important because they hold and spread heat throughout the sauna. Stones like peridotite, olivine, or vulcanite are best since they handle heat well and don’t crack easily.
- Using any random rock can be dangerous: Never use just any rock in your sauna. Some rocks can explode when heated. Always go for proper sauna stones that are made for high temperatures.
- Rough stones make better steam: Stones with a rough surface hold water better, which helps make thicker, more relaxing steam during your sauna session.
- Stacking the stones loosely helps the heat flow: Don’t pack the stones too tightly. Leaving space between them allows air to move and heat to spread better inside the sauna.
- Keeping the stones clean keeps the sauna working right: Dust and dirt can build up on stones over time. Cleaning them regularly helps them work better and keeps your sauna cleaner too.
- Replacing broken stones keeps the heat strong: If some stones are cracked or worn out, it’s time to replace them. Fresh stones keep the heat strong and help your sauna last longer.
Ventilation System (Ensures Proper Airflow)
- Air flows better when vents are placed in the right spots: A well-working ventilation system needs proper vent placement. Fresh air comes in best when intake vents are near the heater, and stale air goes out better through exhaust vents placed higher on the opposite wall.
- Using strong metals for ducts keeps the system safe and lasting: Ventilation ducts made from stainless steel or aluminum are strong, heat-resistant, and long-lasting, making them perfect for the hot conditions inside a sauna.
- Sealing the ducts properly helps keep heat inside: If the ducts aren’t sealed right, heat escapes and too much moisture can build up. Using heat-resistant tape to seal all the joints helps the sauna stay warm and efficient.
- Good airflow makes the sauna more comfortable and lasts longer: When air moves well inside the sauna, it feels better to use and helps protect the sauna from damage over time. A proper ventilation system keeps the space safe, steady, and enjoyable.
Thermometer & Hygrometer (Monitors Temperature & Humidity)
- A thermometer and hygrometer help you know what’s really happening inside the sauna: Monitoring sauna conditions ensures a safe and comfortable experience. A thermometer measures heat levels, while a hygrometer tracks humidity. These tools work together to help maintain the ideal sauna climate.
- Picking the right type means better sauna readings every time: Bimetallic and digital thermometers are both great options, while analog hygrometers are preferred for their accuracy in high humidity. Choosing high-quality instruments ensures consistent and reliable readings every session.
- Where you place them matters just as much as what you buy: Thermometers should be mounted at eye level away from direct heat, while hygrometers should be positioned at a mid-height level for an accurate humidity reading.
Sauna Door (Tempered Glass or Wood)
- A wooden sauna door helps keep the heat inside: Wooden doors, especially those made from cedar or hemlock, are great at holding in heat. They also give your sauna a warm, traditional look.
- A glass sauna door gives a modern look but needs to be strong: Tempered glass doors look stylish and modern. To be safe and last long, the glass should be at least 8mm thick.
- Glass sauna doors lose more heat if not sealed properly: Because glass doesn’t insulate like wood, it needs extra sealing. This helps keep the warm air from escaping and saves energy.
- Good quality hinges stop the sauna door from wearing out: Sauna doors face high heat, so the hinges must be strong. Stainless steel or brass hinges work best because they can handle the temperature without getting damaged.
- A framed glass door holds heat better than a frameless one: Even though frameless glass doors look clean and minimal, having a proper frame helps trap the heat better and makes your sauna more energy-efficient.
- Seals around the door stop heat and steam from leaking out: Heat-resistant seals are important. They keep the hot air and steam inside so your sauna stays warm and works the way it should.
Lighting (Heat-Resistant LED or Traditional Sauna Light)
- Lighting must handle sauna heat without failing: Lighting in a sauna should be heat-resistant to ensure safety. Choose LED lights or traditional sauna lights that can withstand high temperatures.
- Check your sauna lights often to avoid hazards: Be sure to check the lights periodically for any issues with wiring or overheating.
- Good lighting helps you see clearly and feel relaxed: Lighting not only adds to the ambiance but also helps you maintain visibility for safe use.
- Maintaining your lights keeps your sauna safe and enjoyable: Regular maintenance of your sauna lighting ensures that it continues to function properly and adds to the overall sauna experience.
Bucket & Ladle (For Pouring Water Over Stones)
- A good sauna bucket is made to handle heat: A proper sauna bucket isn’t just any container, it needs to handle high heat without cracking or warping. Materials like cedar, stainless steel, and aluminum are popular because they last and don’t get damaged in the heat.
- Not every bucket and ladle works in a sauna: You can’t just use any bucket and ladle in a sauna. Many won’t survive the heat. Always choose ones made specially for sauna use to avoid issues.
- A medium-sized bucket works best at home: For home saunas, buckets that hold about 4 to 6 liters of water are just right. They hold enough water without being heavy or hard to manage.
- Long-handled ladles keep your hands safe from steam: A ladle with a long handle lets you pour water over hot stones without getting too close. It helps you stay safe while still enjoying the steam.
- Deep ladles give big steam, shallow ones are softer: If you want a strong burst of steam, use a deep ladle. If you prefer gentle steam, go for a shallow one. The type of ladle affects how intense the steam feels.
- The right bucket and ladle make your sauna feel real: When you use the right tools, your sauna session feels more authentic, more comfortable, and a lot safer. It’s a small detail that makes a big difference.
Maintenance and Cleaning Tips
Keep It Clean Daily (Regular Cleaning)
To keep your sauna in the best condition, cleaning it on a regular basis is essential. Wipe down the walls, seating, and other surfaces after each use to remove sweat, oils, and debris.
Use a gentle cleaner designed for wood or sauna surfaces to avoid damaging the materials.
Clean the sauna stones periodically and remove any built-up residue. Keeping your sauna clean helps to prevent mold growth and keeps the environment fresh.
Deep Clean When Needed (Deep Cleaning)
In addition to regular cleaning, a deep clean is necessary every few months or as needed. This involves thoroughly scrubbing the sauna's interior, including the walls, benches, and floor.
You may also need to clean the sauna stones and inspect the heating elements for any buildup.
A deep clean ensures your sauna remains hygienic and free from mold or mildew, especially in areas with high humidity levels.
Take Care of the Wood (Wood Care)
Inspect your sauna’s wood regularly for signs of damage or excessive wear. Over time, sauna wood may become discolored or develop splinters.
Sand down any rough patches and treat the wood with sauna-friendly oils to preserve its appearance and durability.
Be proactive about maintaining the wood to avoid costly repairs and ensure your sauna remains in top condition.
Check Ventilation Regularly (Ventilation Check)
Good ventilation is crucial for a sauna to function properly. When converting a shower into a sauna, ensure you install a proper ventilation system to maintain airflow.
This will help reduce moisture buildup and ensure a steady temperature. Regularly check the ventilation system to ensure it is working efficiently.
Without proper ventilation, your sauna could become overly humid, which may lead to mold growth and other issues.
Maintain the Heater (Heater Maintenance)
Maintaining the sauna heater is vital to ensuring your sauna operates effectively and lasts for years.
Regularly check the heater for any buildup of mineral deposits or other signs of wear. For traditional heaters, it’s important to inspect the sauna stones and replace them as necessary.
With infrared heaters, check the heating elements for any signs of damage. Regular maintenance will help prevent costly repairs and ensure the best performance.
Prevent Mold Growth (Mold Prevention)
Mold growth is a common concern in saunas due to the high humidity levels. To prevent mold from forming, ensure that your sauna is properly ventilated. Keep the humidity levels in check and clean your sauna regularly.
If mold is found, act quickly by scrubbing the affected areas with a mild cleaning solution designed to remove mold. Regular maintenance and a focus on airflow will help keep mold at bay.
Clean the Sauna Stones (Stone Cleaning)
- Rinsing the stones regularly helps remove dirt: Sauna stones collect dirt and minerals over time. Giving them a rinse with warm water every few weeks helps keep them clean and working properly.
- Never use soap because it leaves harmful residue: Using soap or detergent might seem like a good idea, but it can leave behind chemicals that are bad for your sauna and health.
- Vinegar and brushing help when dirt is stuck: If the stones get heavy buildup, soak them in vinegar and scrub gently with a brush. This removes the grime without damaging the stones.
- Letting the stones dry fully prevents damage: After cleaning, don’t rush. Let the stones dry all the way before using them again. This keeps them from cracking or breaking when heated.
- Replace cracked stones to keep the heat strong: If any stones are cracked or crumbling, change them right away. Damaged stones can mess up the heating and make the sauna less effective.
- Clean stones make your sauna feel much better: Taking care of the stones helps spread heat evenly, which makes your sauna sessions smoother, more relaxing, and enjoyable every time.
Waterproof to Protect (Waterproofing Tips)
Waterproofing is essential to protect the sauna from moisture damage. Regularly check walls and floors for signs of water damage or peeling coatings.
If the waterproofing layer is wearing off, reapply a sauna-safe sealant to prevent future issues.
Proper waterproofing will not only extend the life of your sauna but also ensure a safe and comfortable environment.
Eliminate Unwanted Odors (Odor Control)
- A fresh smell makes the sauna more relaxing: A pleasant-smelling sauna improves the overall experience. Bad odors from sweat, moisture, and bacteria can make it uncomfortable, so keeping it fresh is important.
- Cleaning regularly stops bad smells from starting: Regular cleaning is the best way to prevent odors from building up. It removes the dirt and bacteria that cause the bad smell in the first place.
- Simple items like baking soda help absorb odors: Leaving a small bowl of baking soda or activated charcoal inside your sauna can soak up leftover smells naturally, without using chemicals.
- Using essential oils makes the air feel clean and soothing: Essential oils like eucalyptus or lavender add a nice scent and make the air feel refreshing. They help cover up unwanted smells in a natural way.
- If it still smells bad, mold might be hiding somewhere: When odors don’t go away after cleaning, mold or mildew could be hiding in corners or behind panels. These need to be checked and cleaned properly.
- Letting fresh air in stops smells from getting trapped: Good airflow keeps the sauna from smelling stale. Ventilation helps fresh air move through and push old, smelly air out.
- Doing small things regularly keeps your sauna smelling great: You don’t need to do much, just a few small steps like cleaning, using natural odor fighters, and opening vents will keep your sauna always smelling clean and inviting.
Inspect for Damage Often (Inspection Routine)
- You should check for cracks and loose boards every month: Frequent inspections keep your sauna running smoothly. Look closely for any cracks, warping, or loose boards at least once a month to avoid bigger problems later.
- Checking the heater and wires can stop serious damage: Inspect electrical components and heaters for any signs of wear or trouble. Fixing small issues early keeps everything working safely.
- A flashlight and moisture meter make your job easier: A flashlight helps you see hidden damage, and a moisture meter shows if there’s too much dampness. These tools help you catch issues you might miss otherwise.
- Writing down small problems helps you stay on top of things: Keep a small log or notebook to record any small damage. This way, you won’t forget, and you can fix things before they turn into expensive repairs.
Cost of Converting a Shower Into a Sauna
- Doing It Yourself Can Make the Sauna Cheaper: If you decide to convert your shower into a sauna by yourself, it will usually cost less. You’ll only need to pay for the tools, materials, and the time you put in.
- Your Skill Level Decides How Much You’ll Spend: When going the DIY way, how good you are with tools will affect the final result, and the total cost. The better your skills, the less likely you’ll waste money fixing mistakes.
- Hiring Experts Will Raise the Total Cost: If you hire professionals to do the job, the cost will go up because of labor charges. But it might save you time and give a more reliable finish.


